
A concrete-pier foundation consists of holes dug down to the frost line and then filled with poured concrete. To simplify the process, the holes are first lined with round fiber-form tubes prior to pouring the concrete. That way, the piers can be cut to extend above ground 6 to 12 inches. There are some benefits of this type of foundation. It saves time and money, it can be used for any size shed–big or small–and because the piers extend down to the frost line, it meets the requirements of a permanent foundation.
Step 1: Layout the Foundation
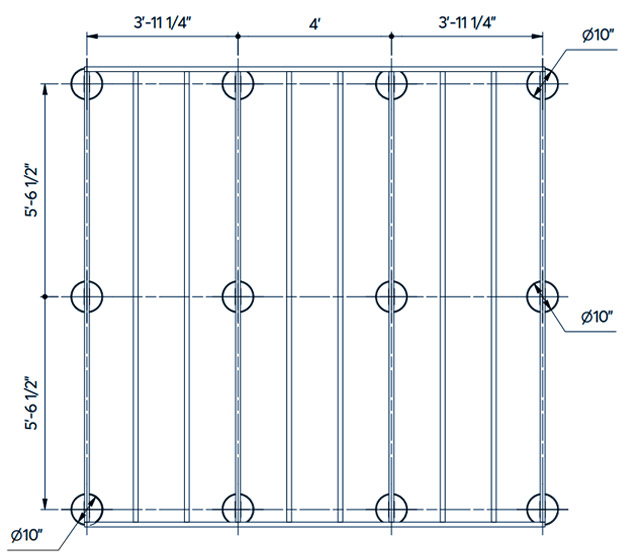
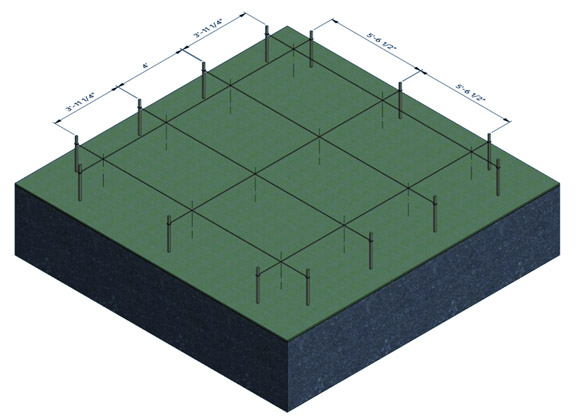
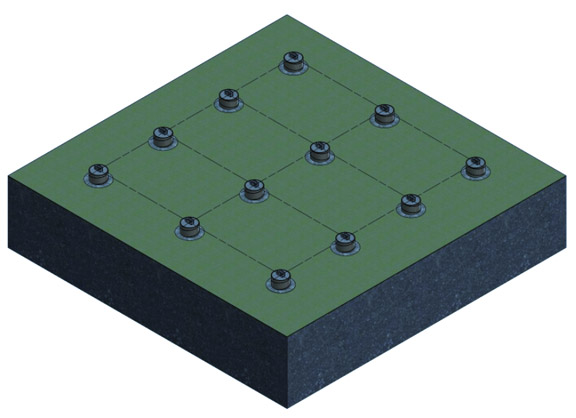
Planning is very important when building a concrete-pier foundation. You will need to know the size of your shed to determine its location and how many piers you will need. (Check the building plan for specific information.) Larger sheds will need more piers, especially if you plan to store heavy equipment. It is best to have too many piers than too few.
Step 2: Prepare the site
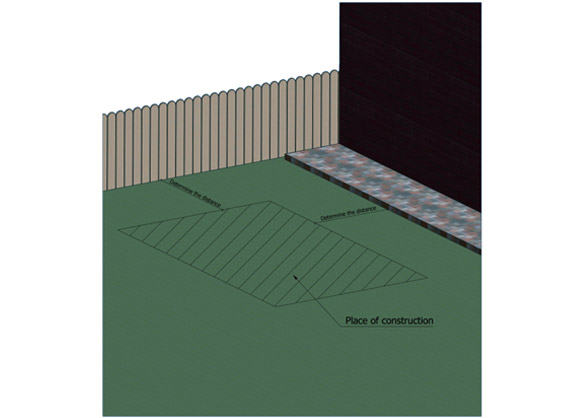
Check with the local building department for the frost line depth in your area. If you live in a warm region with a very shallow frost line depth, dig the holes at least 24 inches deep. Choose where your shed will go. Where does water move and collect in your yard? Is the soil appropriate for a pier shed foundation? Although this may have already been determined in the planning phase, it is important to know what you want to use your shed for. This could make a difference in the location of your shed. Get your materials ready. When you have everything you need beforehand, the project will be quicker and smoother.
Step 3: Mark the border
Outline the perimeter of the shed using stakes and string. Mark each intersection so you will know exactly where to dig each pier.
Step 4: Dig the Pier Holes
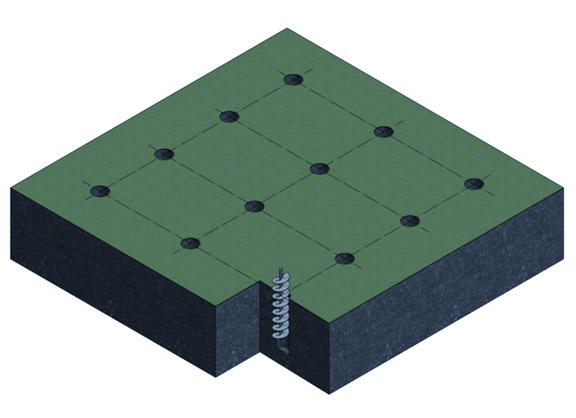
It is important to follow the code for your area concerning how deep the holes should be. Dig each hole about 2 inches wider than the fiber-form tubes. Line the bottom of each hole with about 4 inches of gravel. Compact the gravel with a long 4×4 post.
Step 5: Prepare the Fiber-Form Tubes

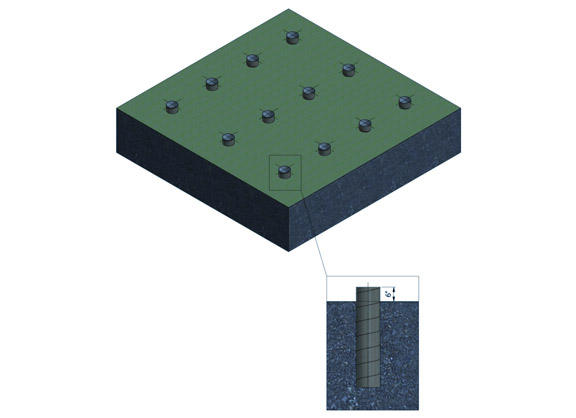
Fiber-form tubes, known by the trade name Sonotube, come in various sizes. Diameters range from about 6 to 36 inches, and the tubes are commonly available in lengths up to 12 feet. When necessary, cut the tubes to the proper height using a handsaw, jigsaw, or circular saw. Be sure each protrudes a minimum of 6 inches above grade. And, of course, the tops of all the tubes must be level with one another.
Step 6: Install the Tubes
Stand the tubes into the holes, use a 4-ft. level to ensure each one is perfectly plumb when backfilling around the tubes with soil.
Step 7: Mix and Pour the Concrete
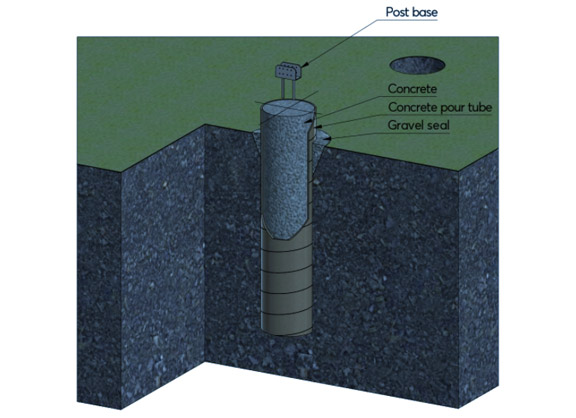
Add water to the pre-mixed concrete and mix until the ingredients are fully hydrated and smooth. Fill the piers with concrete, smooth the top with a trowel, then immediately push a zinc-galvanized post base down into the center of each pier. Stretch a string along the piers to ensure all the post caps are precisely aligned.
Step 8: Cure the Concrete
After filling each fiber-form tube, allow the concrete to air cure for several days. And mist them each day with water to slow down the curing process. To keep the water from evaporating, cover the area with plastic sheeting or tarp. The longer the concrete cures, the stronger it will be.
With the piers done, you can now start building the floor frame. For information on floor framing, click here.
 Joseph Truini is a host on the Today’s Homeowner TV show and co-hosts the weekly Today’s Homeowner Radio Show. He has written three best-selling shed-building books and lives in Roxbury, Connecticut.
Joe , it was a pleasure running into your foundation instructions, as an alpha woman it’s widely questioned by some as to why I chose to build my own home. I have been looking for resources to start an Aframe home in Alaska, and this seems to be one way that is doable in that climate. The frost lines differ drastically in that state depending upon where you are located. I am not a professional by no means , but I do a lot of research and have built many things with error and learning from my dad a lot . Thank you for taking the time to post this it was easy to follow.
Would this be a good foundation to build for a mobile home? Double or triple wide.
Thank you for the helpful information. I am in the beginning stages of building a small studio 16’x10′ with a 6′ porch. I am interested in trying a pier style foundation. Can this type of foundation be done on an area that isn’t level? Is there a maximum height that a concrete pier can be protruding out of the ground? Thank you for your help.